Logan and I have decided to run the ING Hartford Half Marathon on October 15th!
I really was shooting for the full marathon. I started running 2 and a half weeks after Trevor was born to get back into running shape to complete a marathon this fall/late summer. Our move across the country was the biggest setback. I wasn't prepared for nasty humid hot weather! We have no air conditioning or a shower to conveniently shower off in (i.e. bathroom renovation project), I stopped running. I didn't run for 7 weeks!! June 18th was the last day I ran until last week, August 10th. I'm finally back into the groove of things - which is so much easier since the weather has cooled off a bit in the evenings and mornings to run in.
Logan went running tonight for the first time since June 18th! It was nice to have him running again since we both plan on running.
We took Brennan and Trevor to the park to play while we took turns running on the track. The elementary school play ground is right by the high school/football field/track. It was a family affair tonight. Brennan loves to run on the track and cheer on his dad! He ran the opposite way as Logan around the track for one lap. Logan would pass Brennan every quarter lap rather since they were going opposite directions.

Monday, August 15, 2011

Wednesday, August 10, 2011
Bathroom Remodel: plaster + hot humid days = slow progress
I've slowed down and started studying more. This last week I have been working on PLASTER. I've never taped a drywall seam so I had to watch a video on that. Paper tape is tricky stuff. Who would've thought that up? Some of the conventions of home construction seem so random, like, there's gotta be a better way. But then we just end up doing it how we've always done it because that's what we know, and those are the most readily available, cheapest materials.
I did a bunch of plaster work on Saturday and it wasn't fully dry until Tuesday! Doesn't help that we're showering in there and it's been 90% humidity. Then more plaster Tuesday and now waiting for that to dry. I had a friend help with the electrical hook-ups and re-positioned the outlets and light fixtures, which required cutting into the old lath and plaster, carefully chipping it down to the bare lath, then patching over the lath with 1/4" drywall. Not sure this is how you're supposed to do it but it worked well.
Heather and I went to Home Depot again and picked out towel rods, TP dispenser, hand towel ring, paint colors, and looked at some very expensive mirrors and medicine cabinets. I hope to have the vanity and sink installed this weekend! It will be tricky getting the plumbing and duct work, not to mention the sloping floor and wavy walls, to fit together and look good with a perfectly square and perfectly finished vanity. We sort of splurged on the vanity/sink/countertop setup. Pictures to come soon!
I am also mostly done with the baseboards, wainscoting, and chair rail. How convenient that the majority of the lath/plaster defects were within the lower 3 feet of wall, now covered with elegant-looking wainscoting and trim work. I opted with the cheap particle-board trim boards and so far they've been going in nicely, with the help of my wife's staple gun to set the corners together tightly.
Sunday, July 31, 2011
Bathroom Remodel: success! Functional shower & toilet

Grouting the tile turned out to be a more tedious job than I anticipated; we did the shower tile together one night and it kept us up until 2am. I made the mistake of not wearing gloves and rubbed my fingers raw scrubbing with the sponge and rubbing the grout smooth with my finger. Heather wore gloves - smart. The results were perfectly satisfying, however. The next day I installed the shower fixtures and applied caulk between the tub and tile:

Our brand new, fully functional tub and shower! We love the ability to control temperature and flow separately, which allows you to turn down the pressure and save water, or get a full-on environmentally UN-friendly tsunami. The detachable head is great.

Shelves coming in handy already.
I did some research about caulk and learned a few things. (1) the new acrylic caulk holds up better and bonds better than the silicone caulk, and is easier to work with. (2) the caulk allows your tub to move a little as it settles with a full load of water then springs back as it's emptied. I've noticed grout between the tub and tile in a few of my relatives' bathrooms, and more often than not there was a section of grout missing, cracked, or bulging out. It just doesn't flex like caulk does. (3) You have to FILL THE TUB with water and caulk with it full! This was bizarre to me until I realized the concept: you want the crack filled when it's biggest so that it has to deal more with compression forces rather than stretching forces. I don't know how much this will matter in our case as I secured the tub to the wall with multiple steel brackets, plus it's on a very solid bed of cement. Nevertheless, it's satisfying to know I've done it right.
As I mentioned before there's a slope to our floor - nearly 1" from one side of the room to the other - and this was a challenge when laying tile, to get the 12" tile to match at the corners elevation-wise. In fact, where the slope changes, it's impossible to get it to match without breaking a tile in half. Thus I chose 1/4" grout lines which helped to cover up the small elevation changes.
Heather, Alex Hay (her niece), and I did the floor grout on Friday night in about 2 hours. We worked quickly and I think it went quicker having learned a bit about grout from the wall tile. Or maybe it was the motivation of the Ben & Jerry's Chocolate Fudge Brownie awaiting, and the movie Source Code (great movie, fairly clean for a PG-13). We chose a darker color for the tile to hide dirt and, I guess, make it feel like a floor.

Here's proof Heather did help with the project! Turns out she's a natural pro grouter.

You'll have to trust us for now - the final result is great.
Yesterday, I stumbled through a toilet installation. First hook-up only took an hour or so, and I had the toilet assembled and working. Then I noticed a small leak from the old supply line valve (which, I discovered, was missing a small brass ring required to achieve a water-tight seal). Ran to Home Depot for a new valve (and got side-tracked in the plumbing aisle and purchased a fridge ice-maker supply line kit), and came back to see that there was apparently a leak from the base of the toilet as well. After THREE wax rings and some adjusting of the PVC replacement flange that the toilet sits on, it finally sealed well. Finally, finally, no more sewer fumes in my face!
Then as I was tapping in some shims to help stabilize the base, I knocked the rim of the toilet ever so slightly as I was moving a hammer from one side to the other, and CHIPPED the rim!!! So, our brand new toilet has about a 5mm chip on the rim, clearly visible even with the lid closed. When wiping down the toilet after installation, the dirt on my rag turned that chip a nice dark brown color. Totally obvious. Feels like a brand new car with a ding on the door. I guess I'll buy a porcelain chip fix kit next!

Our Kohler toilet. (No you're not supposed to fully assemble it before placing it unless you really want a back workout.) Oh, here you can see the finished grout and how dark it is when wet, vs. dry. And there in the corner a crumpled up wax ring and the little wooden shims I used to stabilize the toilet (they'll be hidden by the caulking)
Now we can SHOWER and TOILET in our upstairs full bath! Yay! After a month without a shower in the house, it feels great. But we have to use the tub to wash hands after toileting, and the vanity, sink, and mirror await electrical wiring, which I'll have to learn about because I've never done that either.
Sunday, July 24, 2011
Bathroom Remodel: New Tile!

Both glass and travertine made it into the installation, and the travertine is up high enough that I don't think it will need to be sealed more than once (while we live here anyway). I really wanted light turquoise glass tile accents but if I got exactly what I wanted with the first bathroom I've ever done, I may just never remodel another bathroom! Check it out:

Hard to tell but it's 90 degrees INside. Wall tile halfway done. You can see the bright blue waterproof layer that I painted right onto the Hardibacker. It's a rubberized undercoat by Laticrete that is approved for swimming pools. I can guarantee this shower would be waterproof even without any tile - there's a thick bead of caulk joining the waterproofed cement board to the tub. I had extra waterproof paint so I did half of the floor too!

Wall tile is complete. First tile job - more tedious than I thought it would be but much more fun than laying subfloor or cement board!

"Take a picture of me, daddy!" So here's some of the floor tile too. Obviously not done - I need to buy a new diamond blade for the wet saw I'm borrowing from Dave. Not sure if I was pushing it too fast or if it just wore out.

New stained and sealed solid oak threshold, leveled and cemented in place. The old one was a solid piece of white marble that I intended to keep but it broke in half during the demolition :(

12x12 sheets of accent tile from Home Depot. At about $8 per sheet, they're much cheaper than the $30 sheets we were considering at Best Tile.

His mouth is still full with a bite of YUMMY home-made chicken/feta/tomato/spinach pizza!

Yep, fully functional bathtub. If you don't mind the hose-style faucet.

Detail shot. Why I love glass? The internal shadows and reflections are like little individual swimming pools (especially if we had gone with the light turquoise). I love natural colors. Don't worry, we'll paint over the pink walls soon enough!
Bathroom Remodel: New Tub!

The mess! unfortunately, this is the only picture I have of the beautiful new subfloor. The plywood has already been covered with 1/2" cement board which was glued (with thinset) and screwed to the plywood. You can see the lengthened partition wall, now covered with drywall.
The reason the tub comes first is because the floor and wall tile are installed overlapping it; there's a 1" lip around the edge of our tub which allows the wall cement board and tile to overlap and ensure no chance of leakage behind the tub.

We had bought the tub at Lowe's along with just about every other big item. Our car won't fit much, and so we tried to get every large item both to maximize the "10% off entire first purchase" coupon, and the truck rental required. It's an acrylic tub, so Heather and I were able to handle it easily.
New tub (with Hardibacker cement board in place too). That raw copper stub has been our source of bathing water for a week or two now. It comes out like a hose and if it's on full pressure, the stream hits halfway up the back of the tub.
The tub slid into place perfectly, much to my surprise. I really thought I'd get away with simply sliding it into place, screwing in the metal brackets, and calling it good. However, it required a combination of three different drains to get the right pieces. With a functional drain, we now had a functional bathtub, and so I opened the box to our shower head and installed the new main valve and handle temporarily. Then, we took much-needed baths! No leaks in the plumbing or drain, BUT, we discovered the drain was slow!! Last thing you want on a brand new tub is a slow drain...
This was devastating news to me! I knew the floor had settled nearly an inch, and some more surveying showed that there was barely enough elevation change for the drain (1/4" drop per foot is required). Then I did some reading about setting a tub in CEMENT and got excited about that. Some tubs require this; ours didn't. This would help make the tub exactly level, add 1" of elevation to the drain, and make the acrylic tub feel and act like a cast-iron tub. Of course, it's a lot of work and I've never worked with cement or mortar before, but at $5 for an 80-lb bag, it was very little additional cost. I also spent $15 during the same trip and purchased a "drain auger" or "plumber's snake" and was relieved to discover that a few passes of that made the tub drain much more quickly.
When it came time to lay tile, I was so glad to have a perfectly level tub! I'm realizing over and over that it's crucial to get things right so that a seemingly small mistake doesn't lead to multiple costly and time-consuming compensatory measures down the road.

Trevor! Almost 5 months...
Friday, July 22, 2011
First Visitors
We've been in our house just over a month now. Time really has flown by. We still have boxes to unpack and rooms to finalize and decorate. The bathroom is still in progress and I have mentally put life on hold until it is finished. Mostly because many of the boxes needing to be unpacked have to do with the bathroom or Trevor and Brennan's bedrooms. The bathroom "work room" is Brennan's new room and Trevor is in our walk-in closet/sleeping deck.
Even with all of the work and unpacking going on, we had some friends from D.C. (Virgina) come and visit last week end (our 3rd week here). Maren, Joseph and their beautiful daughter Adelaide came to spend the weekend with us and to see the Hill Cumorah Pageant.
They arrived late Friday night and we hung out Saturday at Lake Ontario before the pageant.
 We took a stroll to the end of the pier. It was a hot enjoyable day - not humid.


 Brennan loved to run up the pier and see the water. Of course he has to jump off everything he passes by.
 Logan was a sport to wear Trevor. I was a bit worried about his skin with the hot sun but Logan didn't seem to worry. I'm the worrier I guess.

 Playing at the park for a while before heading back to our house to swim in the pool.
 Brennan didn't want to get off the swing. He could swing all day if someone were there to push him. I thought he looked pretty cute just sitting there. He was pretty patient for me to snap a picture before I went to push him.
 Trevor loves being outside. He's always so fascinated with the leaves blowing in the trees. He is the sweetest boy and is so easy going. We sure love him. He loves to watch Brennan play and observe the world around him.
After the park and the swim in the pool, Maren and I headed back to the park to enjoy some frozen custard and some time with out kids to talk. Abbots Frozen Custard is to die for!!
We got back to my place in time to help Logan finish a batch of cookies and make a fruit salad for a neighborhood party. Our amazingly kind neighbors hosted a street party that evening. Maren and Joseph were kind enough to tag along. The party was a great opportunity for us to meet some of our neighbors.
Joesph went to the party for a bit and then left to get seats for pageant. Maren and I put the kids down for bed while Logan went to pick up a babysitter for the evening. Having a babysitter was a perfect end to a fun filled day. We drove up, watched the pageant (and even wore light jackets with blankets around us), and drove back home in separate cars.
Logan and I missed the exit on the way home and had to drive 15 more minues on I90 to exit. Then we were on the west side of the city and had to drive 19 more miles to to our house! Dumb mistake we will never repeat. Next time we'll pay more attention and not be busy doing our own things (I was adding contacts to my new phone and Logan was busy thinking about the bathroom project).
We really loved having visitors and hope they come back again in the next 4 years we're here - of course after we go visit them ;) Anyone is welcome!!
Even with all of the work and unpacking going on, we had some friends from D.C. (Virgina) come and visit last week end (our 3rd week here). Maren, Joseph and their beautiful daughter Adelaide came to spend the weekend with us and to see the Hill Cumorah Pageant.
They arrived late Friday night and we hung out Saturday at Lake Ontario before the pageant.
 We took a stroll to the end of the pier. It was a hot enjoyable day - not humid.
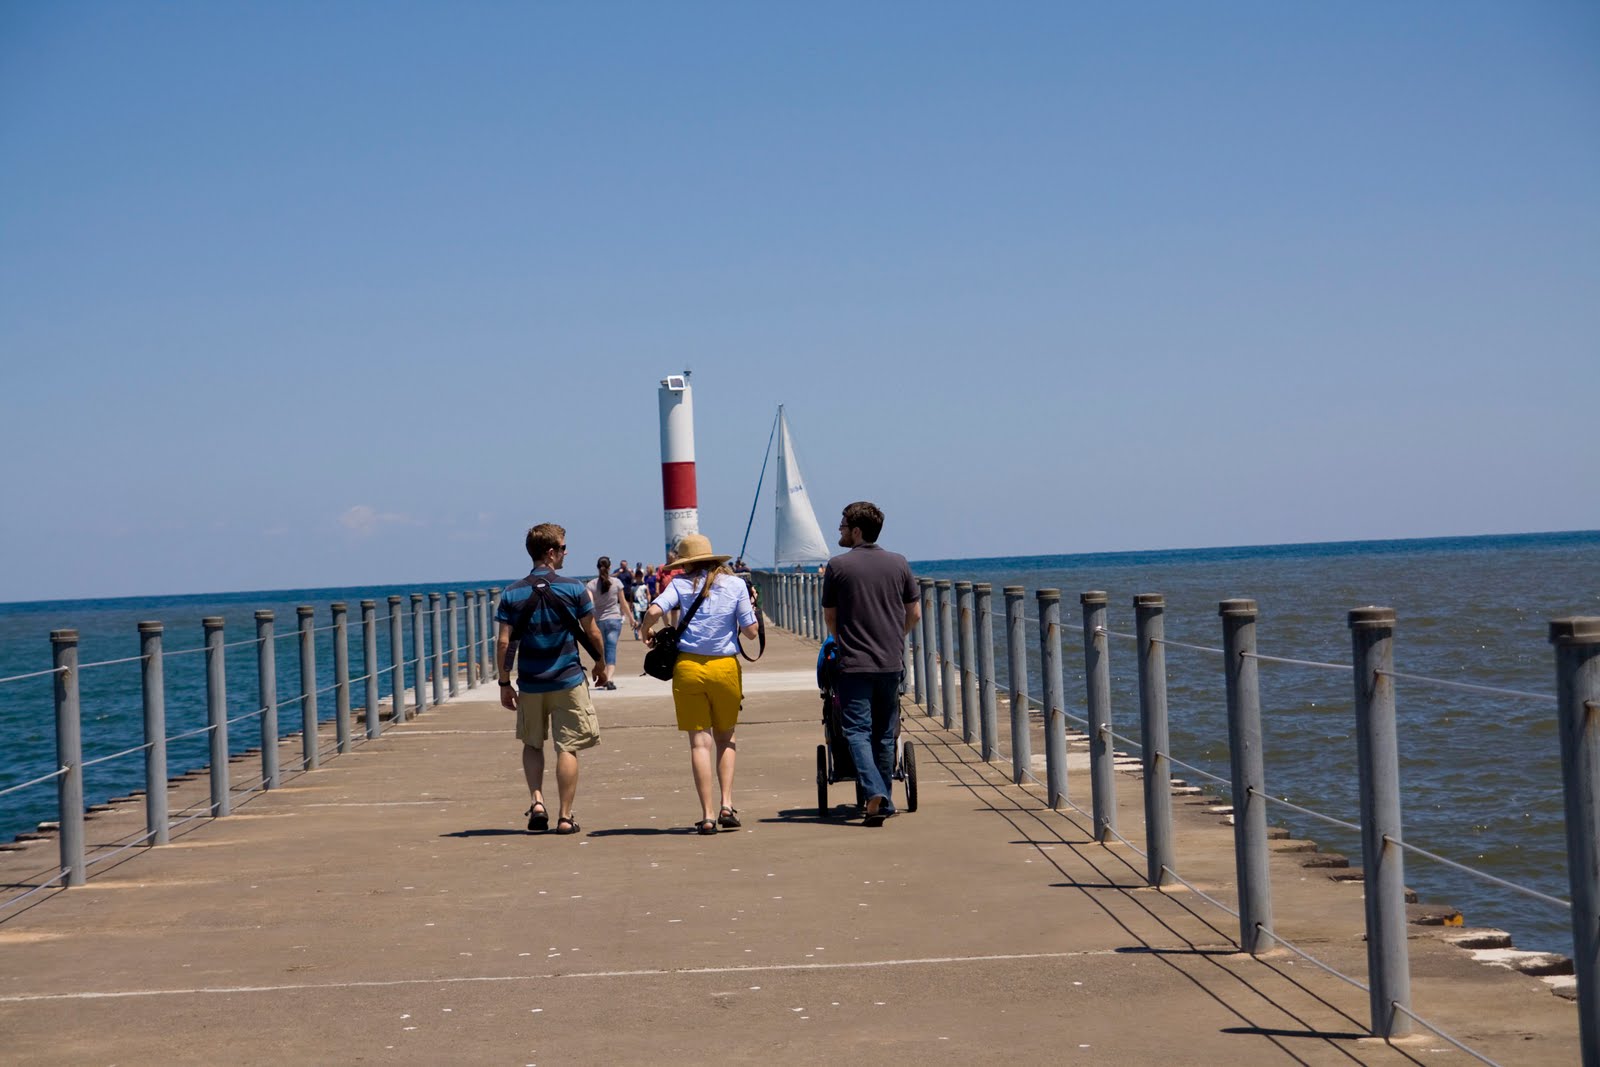


 Brennan loved to run up the pier and see the water. Of course he has to jump off everything he passes by.
 Logan was a sport to wear Trevor. I was a bit worried about his skin with the hot sun but Logan didn't seem to worry. I'm the worrier I guess.

 Playing at the park for a while before heading back to our house to swim in the pool.
 Brennan didn't want to get off the swing. He could swing all day if someone were there to push him. I thought he looked pretty cute just sitting there. He was pretty patient for me to snap a picture before I went to push him.
 Trevor loves being outside. He's always so fascinated with the leaves blowing in the trees. He is the sweetest boy and is so easy going. We sure love him. He loves to watch Brennan play and observe the world around him.
After the park and the swim in the pool, Maren and I headed back to the park to enjoy some frozen custard and some time with out kids to talk. Abbots Frozen Custard is to die for!!
We got back to my place in time to help Logan finish a batch of cookies and make a fruit salad for a neighborhood party. Our amazingly kind neighbors hosted a street party that evening. Maren and Joseph were kind enough to tag along. The party was a great opportunity for us to meet some of our neighbors.
Joesph went to the party for a bit and then left to get seats for pageant. Maren and I put the kids down for bed while Logan went to pick up a babysitter for the evening. Having a babysitter was a perfect end to a fun filled day. We drove up, watched the pageant (and even wore light jackets with blankets around us), and drove back home in separate cars.
Logan and I missed the exit on the way home and had to drive 15 more minues on I90 to exit. Then we were on the west side of the city and had to drive 19 more miles to to our house! Dumb mistake we will never repeat. Next time we'll pay more attention and not be busy doing our own things (I was adding contacts to my new phone and Logan was busy thinking about the bathroom project).
We really loved having visitors and hope they come back again in the next 4 years we're here - of course after we go visit them ;) Anyone is welcome!!
Brennan

I've been doing a lot of sewing lately. Brennan has been my sidekick and great helper. He loves to help cut paper - since I don't let him use my fabric scissors. I don't want him getting used to cutting fabric (i.e. clothes). He loves my retracting measure tape. I even took it to church last Sunday to keep him occupied during sacrament meeting. Worked like a charm.
Brennan loves my new sewing set up as much as I do. Opening my drawers and pulling things out could keep him occupied all day! We put a little table and chairs in the room for Brennan to work while I'm sewing. He loves it and so do I.
I was taking some pictures of stuff for my Etsy shop today and snapped this one of Brennan.
Subscribe to:
Posts (Atom)